One of the greatest challenges in underwater photography is shooting wide angle photographs in low light levels such as those here in New Jersey. When I was shooting film, it was much more difficult than it is now. The problem with film is that you have to choose a particular film speed before you enter the water. The maximum usable speed for photos was 400 ISO. When higher speed films were used, they exhibited a very grainy look and although some people liked this look, it wasn’t for me.

Shooting with a Nikonos rangefinder camera made wide angle underwater photography in low light even more difficult. If I chose a film speed of 400 ISO, I was limited to a minimum (slowest) shutter speed of 1/30th of a second. Although that seems pretty slow, the combination of 400 ISO and 1/30th of a second shutter speeds did not allow for a lens opening that provided good depth-of-field and with rangefinder cameras where you have to estimate the distance between the camera and the subject (there is no in-camera focusing or autofocus), depth-of-field was crucial. My initial foray into low light levels with the Nikonos camera was frustrating. I could never get enough light into my photos. Things changed for me thanks to the amazing National Geographic Photographer, David Doubilet.
We were diving off the coast of New Jersey and I was explaining my frustration with wide angle photography in low light. He told me to try something. He said to set my shutter speed on my Nikonos rangefinder camera to the “Bulb” setting, trigger the exposure and count “1001, 1002, etc.” and then release the shutter. In the bulb setting, the shutter stays open as long as the shutter release is depressed. This allowed much more light into the photo. The exposure results were dramatically better but could not be consistently repeated. It did get me moving in a better direction.
I realized that I needed more control over my shutter speed and the only way to make that happen was to change camera systems and use a single lens reflex camera (SLR). This would give me greater control over the slower shutter speeds required to allow more light into the photo. Before I continue on my journey, I would like to point out the variables in wide angle underwater photography in low light levels and how I go about determining exposure. My first consideration is lens choice. Because I am shooting in water, a wide angle lens is necessary and a lens that focuses close is equally important. The proper lens allows me to get close to the subject and minimize the amount of water between the lens and the subject. Next choice is lens opening. I want to get a large depth-of-field which is the area that is in focus in front of and behind the main subject. This requires a smaller lens opening (larger numbered f-stop). I usually try to use at least f8 or f11. Although film speed would be the first choice for many, it wasn’t for me because I almost always used 200 or 400 ISO slide film. I would choose a shutter speed once I was in front of my subject and I could use my light meter to determine the speed required.

As an example, let’s look at a hypothetical film situation. I am on the artificial reef, Spartan – a small tugboat on the Sea Girt Artificial Reef off New Jersey. My film speed is set at 400 ISO. My lens opening is f8.
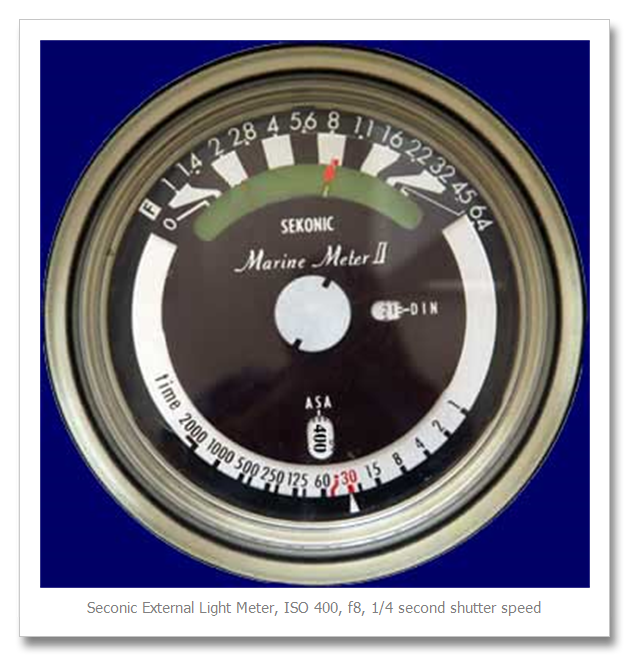
Using an external light meter, I meter the water on a slightly upward angle making sure that I am not metering into the sun. I adjust my shutter speed until I have a correct exposure using a lens opening of f8. This could require a shutter speed as slow as 1/8 second to 1/4 second. In this case, it was 1/4 second. To shoot at this slow shutter speed requires steadying the housed camera on the vessel itself or using a tripod. I found that I could use the slowest speed with acceptable results but there were also many throwaways. After calculating all of this, I still had one more exposure setting to make and that was the power setting for my underwater flashes. I tried to shoot from a distance of three feet from my subject so I was able to set my flashes at 1/2 power. The flash exposure is based on the film speed, camera to subject distance and lens opening. The good thing about flash exposure is that it is pretty consistent once determined for a particular film speed-lens opening-camera to subject distance.
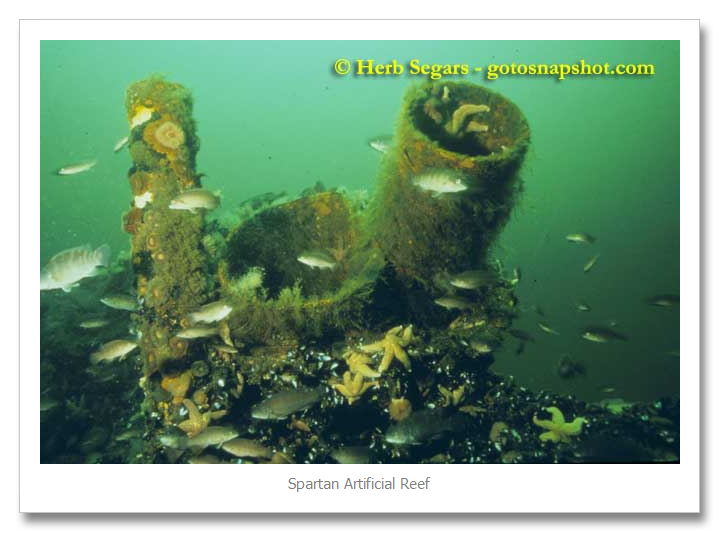
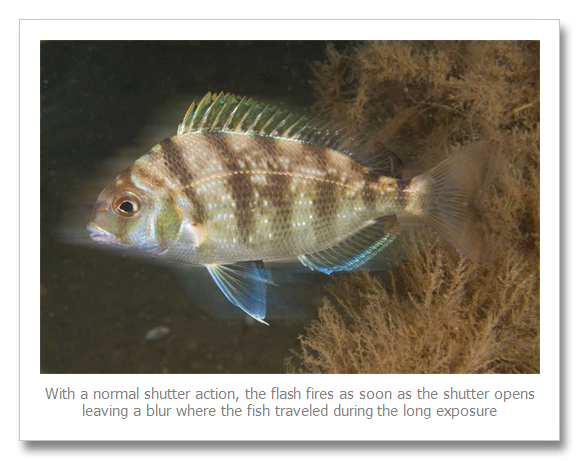
This worked well but it did have an unintended consequence. When a flash is triggered on a camera, it can fire at two different times (depending on the camera). My camera was set to fire as soon as the camera shutter opens. If you look at the fish in the upper left hand portion of the photo above, you will see a green glow in front of the fish. That is caused by the distance that the fish travels while the shutter is open. The flash (which fired as soon as the shutter opened) freezes the subject in place. Any movement after that is recorded as the blurry area in front of the subject. That is cool but it is not natural. It almost gives you a feeling that the fish is swimming backwards.
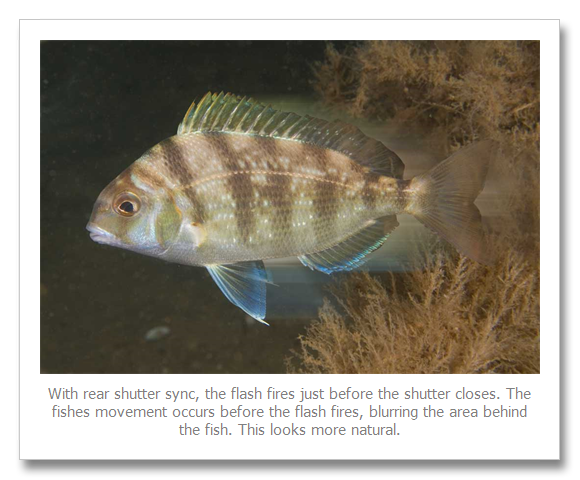
Many SLR’s have a function called “Rear Shutter Sync” where the flash fires just before the rear shutter closes off the lens opening. Using this, the fish will travel whatever distance it covers during the time that the shutter is open and the flash fires just before the shutter closes – freezing the fish at that moment. It creates a blur behind the fish which is a much more natural look.
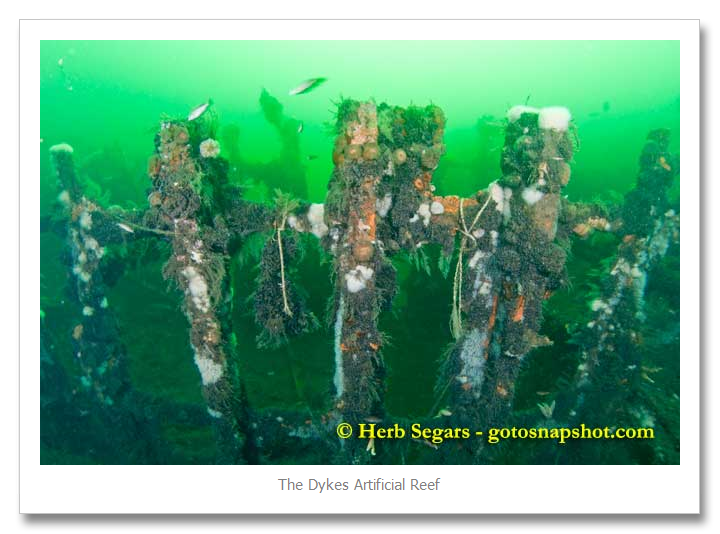
If you look at the fish just to the left of top center, you will see the blur (or shadow-looking area) behind the fish. This exposure was 1/6th second at f11. The following two photos further illustrate my point. I did these in Photoshop to make it easier to visual what happens. Remember, this only applies to slow shutter speeds of around 1/8 second and slower.
An added advantage to creating an exposure that is very close to the ambient light exposure is that it minimizes the look of backscatter in the image. Backscatter is noticeable because the illuminated particles are so much brighter than the background. As the background is made lighter, the difference in illumination lessens.
The last part of the struggle shooting film was not knowing the outcome of your photos until the film returned from the processor. That is in additional to the 36 exposure limitation of film cameras.
Fast forward to today and the world of underwater photography has exploded. There are now housings for most makes of cameras. In the film days, these choices did not exist. What hasn’t changed is the requirements for shooting wide angle photos in low light levels. Two things have changed dramatically for the better. First, the ability to change ISO. Not only can you dial in a higher ISO to increase the amount of light coming into the camera, you can change it from frame to frame if need be. The second and perhaps, the most important factor is the ability to see the results of your efforts immediately. You can see the finished product on the camera’s LCD screen and the histogram will provide the information needed to make corrections.
The following is how I would typically approach a wide angle photo in the Atlantic Ocean off the coast of New Jersey where light levels are typically low.
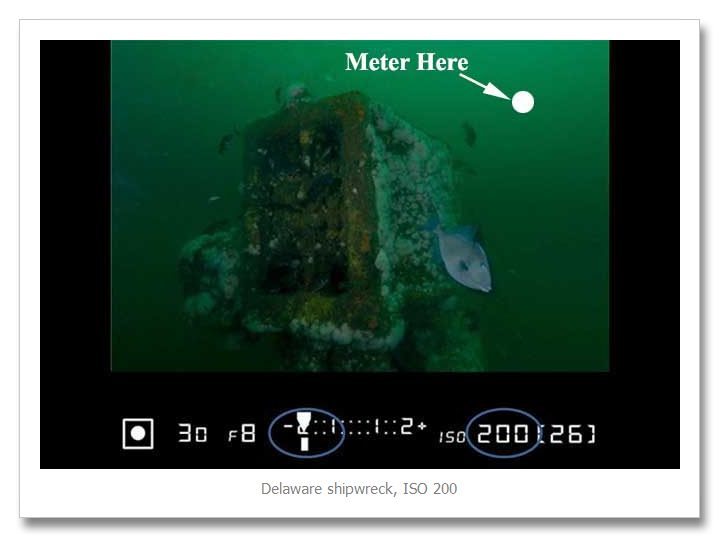
This is a scene of the top of the engine on the shipwreck, Delaware, that sunk in 1898 off the coast of Bay Head, New Jersey. I started with a lens opening of f8 and a shutter speed of 1/30 second. These are choices that I made before doing anything else. I set my in-camera light meter to spot metering and I metered the water in the upper left hand quadrant of the photo. Do not meter into the sun as it will throw off your exposures greatly. With a starting ISO of 200, I see that the available light exposure is 2 stops underexposed. Without changing lens opening or shutter speed, I adjust the ISO to a faster setting which will allow more light into the camera.
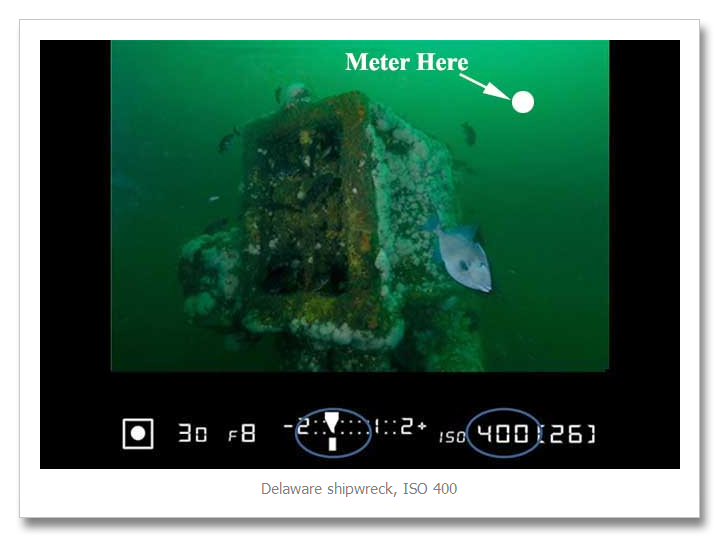
At ISO 400, the available light exposure is still underexposed by 1 f-stop. My strobes are firing during all the exposures and the settings on my dual Ikelite DS-125’s are at quarter power.
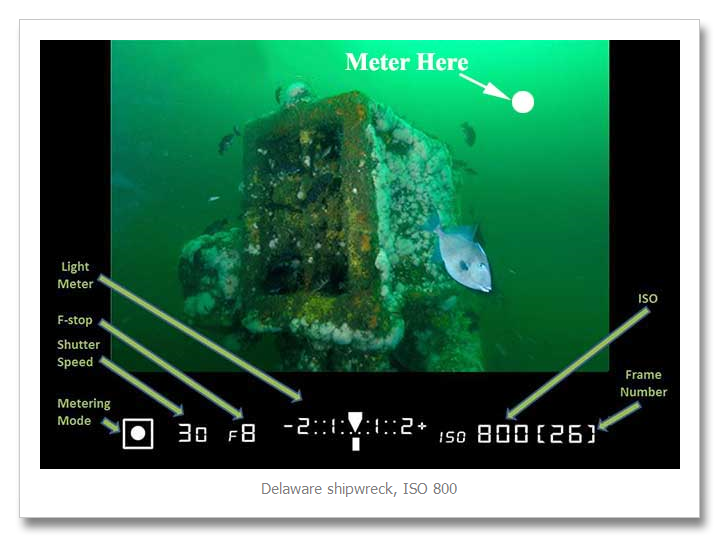
At ISO 800, the meter is centered and the result will be a correct available light exposure. Before I start taking photos, the next thing that I do is to change the power settings on my strobes for correct exposure for the ISO and camera-to-subject distance. In this case, quarter power is the correct setting so I am good to go. Modern digital cameras have made this procedure so much easier. In film days, I would have already entered the water with a predetermined film speed. I had the ability to push the film to a higher ISO but once that decision was made, it was made for the entire roll of film.
The following is another example of how the changes in ISO affects the exposure of the image. Digital cameras handle higher ISO’s very well and shooting at 800-1000 ISO is very commonplace. Some of the high end digital SLR’s like the Nikon D800 handle even higher ISO’s well and allow the photographer to shoot with faster shutter speeds and higher numbered f-stops for greater depth of field.


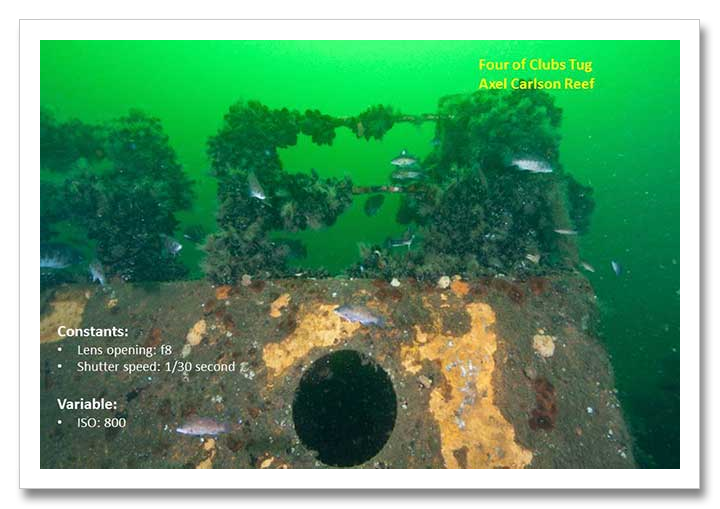
In the three examples above, my strobes were at quarter power which was adequate at ISO 800 but was not for ISO 200 and 400. At ISO 200, my strobes needed to be at full power and at ISO 400, half power. I did not change the output of the strobes in each photo as that would have confused the results.
All-in-all, this type of wide angle photography is not terribly difficult if approached methodically. There is no reason that you cannot settle on a lens opening and shutter speed for most situations and adjust your ISO and strobe power setting to suit.
I have seen photographers who are taking a different approach. Shooting wide angle shipwreck photos at high ISO’s and large-sized lens openings (f2.8) and no strobes. They are shooting available light exposures. The plus of this type of photography is no backscatter because there is no flash to illuminate particulate. The downside is shallow depth-of-field and lack of color from underwater strobes. In most examples that I saw, a diver with a light was in the photo. The diver was pointing the light at the shipwreck. The result was a very pleasing photo. I am not sure how the shallow depth-of-field would hold up when viewing the high resolution image. The photo that I saw was on the web and was low resolution. In any case, it offers another way to shoot in low light levels.
© 2013, Herb Segars. All rights reserved.


1 thought on “Wide Angle Underwater Photography In Low Light Levels”