
When I am shooting underwater and the subject is large like a shipwreck or when I expect a lot of particulate in the water, I consider using a Magic Filter. On a recent trip to the Cayman Islands, I had a few opportunities to use one. The Magic Filter is a red colored filter that can be used on the front of the lens, held in place by a diopter, a sky light filter or a filter ring with the glass removed. It can also be taped to the back side of the lens if the lens does not have a front filter thread and finally, it can be taped to the front of the lens on point-and-shoot cameras. You can find out more information about the kinds of Magic Filters and how to use them at the Magic Filter web site: Magic-Filters.com.
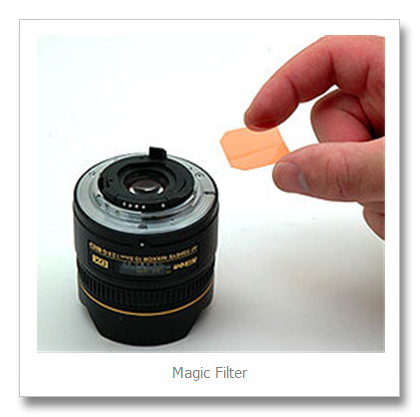
I was shooting underwater with a Tokina 10-17mm fisheye zoom lens. This lens does not have a front filter thread so the Magic Filter is taped to the back side of the lens.
The Magic Filter is shown to the left being placed on the back side of a lens. I take small pieces of Scotch tape and place them on the back of the lens with a pair of tweezers. I used a Magic Filter that I had originally purchased for a Nikon 10.5mm lens. I cut it down a little so that I could have room for the tape.
I use a Nikon D300 camera in a Subal housing and a Zen 100mm (4”) dome port. To use the filter correctly, it is necessary to do a custom white balance underwater.
The procedure seems simple enough and I practiced it on land before going underwater. All went well. Strobes are not used with a Magic Filter. To do a custom white balance, I have to hold down the “White Balance” button on the top of my housing and turn the back command dial until I see “Pre” in the viewfinder. I then let go of the button and push it down again and hold it until it starts flashing. I then take a photo of something white or neutral colored. The sandy bottom usually works well. If the custom white balance is successful, the word “Good” will display in the top LCD screen. If it is not good, Not Gd” will be displayed. Often when the result is not good, it is a lack of light so I will either open up the aperture or raise the ISO.
On my dive the Russian Destroyer 356 (MV Captain Keith Tibbetts) off Cayman Brac, I could not get the custom white balance to work underwater so I went ahead and shot with the thoughts of fixing the white balance in Photoshop. I took quite a few photos over two dives so I was hoping that the fix would be painless. I will detail what I did in Photoshop and how to do the same in Lightroom.
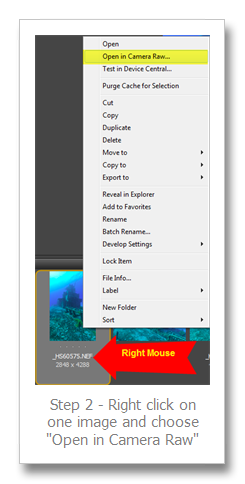
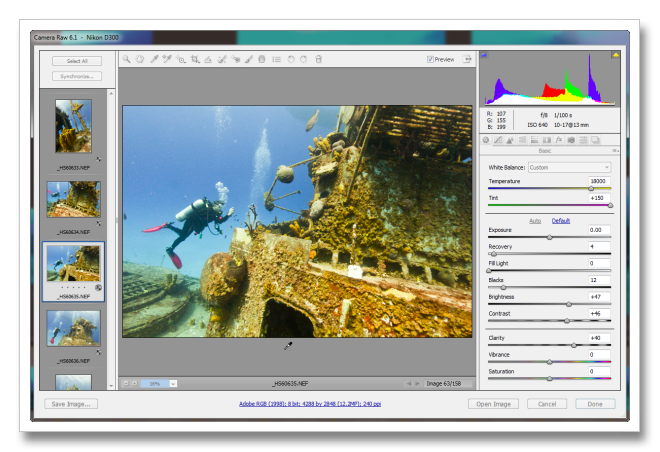
First, let’s look at Photoshop. I opened Adobe Bridge and selected the file with the Russian Destroyer folder. I then choose “Edit”, “Select All.”
Then I right clicked on one of the photos in the bottom row and choose, “Open in Camera Raw.” I want to point out that I shot raw files but you can open up jpeg files in Adobe Raw and make adjustments to them just as you would a raw file. The changes will be saved with the file but they can be undone at any time.
In the next step, choose a photo that has an area that can be easily white balanced like the sand in front of shipwreck. Don’t worry about any photos that you have that don’t have an area to click on, we will fix all of them together. After you have chosen the photo to white balance, click on “Select All” in the upper left hand side of the box.
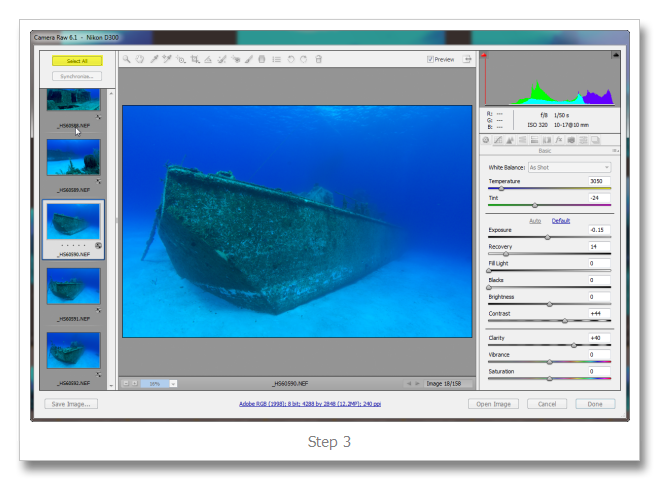
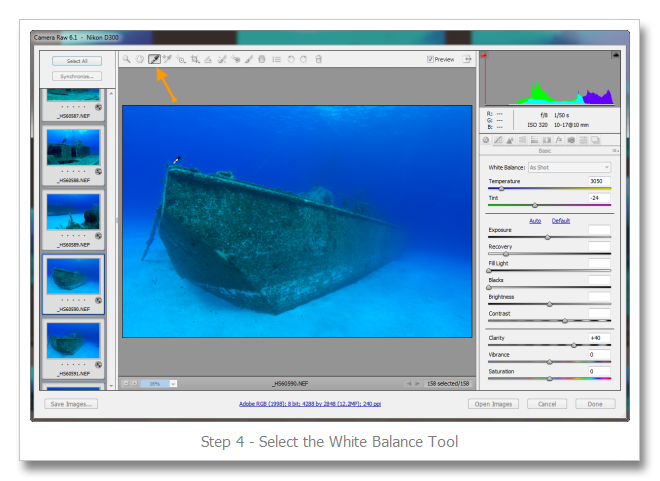
After all the photos are selected, choose the “White Balance” tool. It has an eye dropper icon and is the third tool from the left above the image.
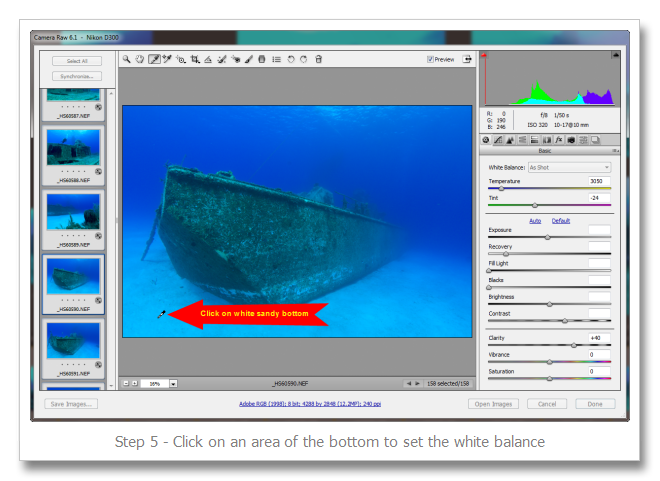
Using the white balance tool, choose an area on the sandy bottom and click on it. This will set the custom white balance for all the photos selected.
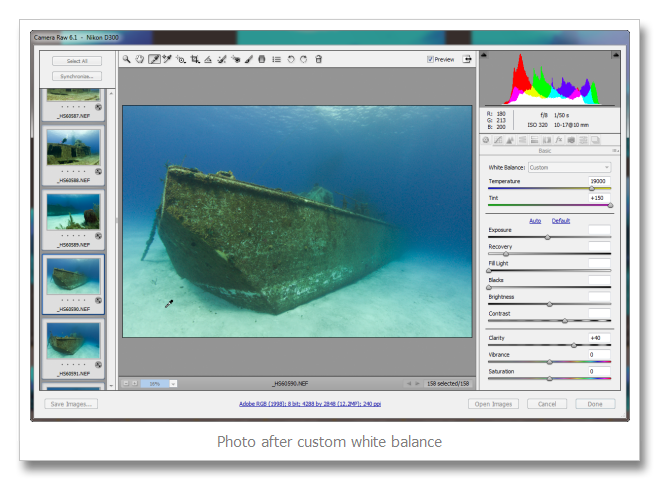
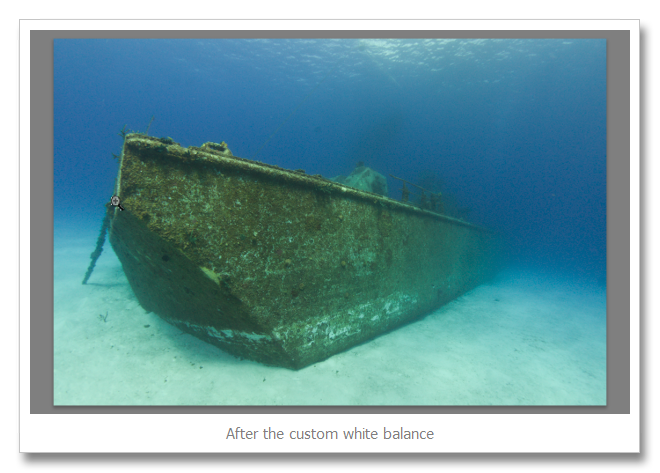
Here is what the photo looks after choosing our new white balance:
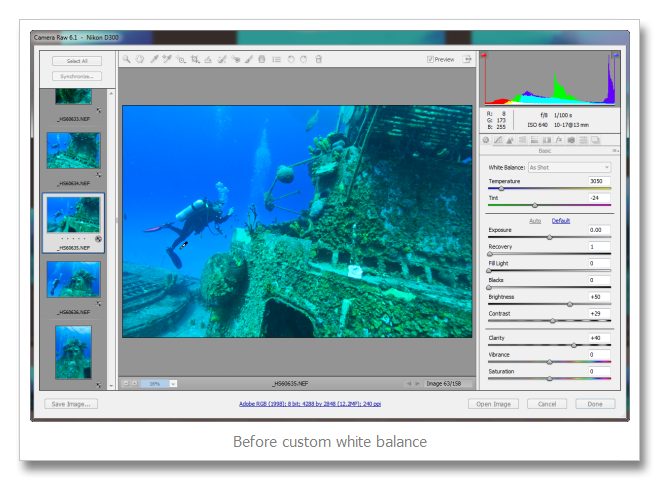
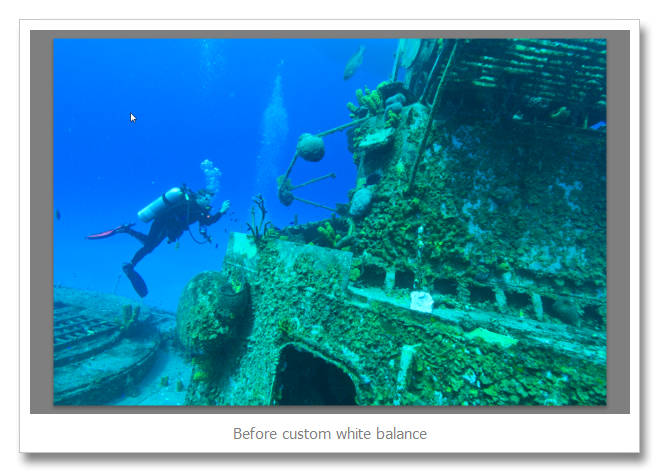
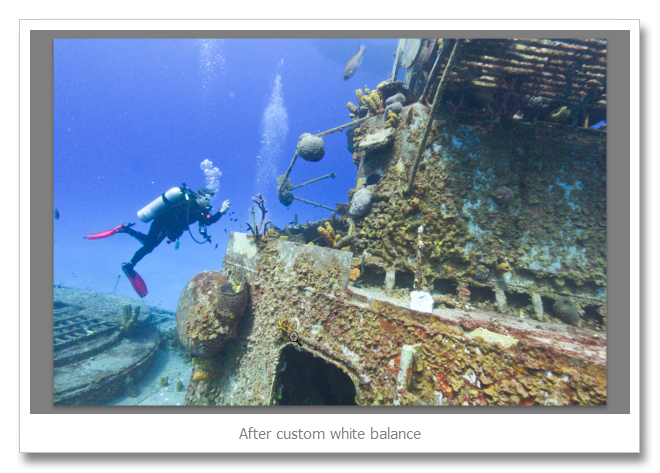
To show how this affects all the photos, i have chosen another photo and will show the before and after look:
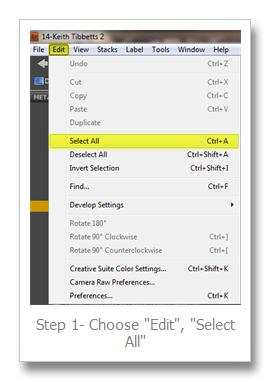
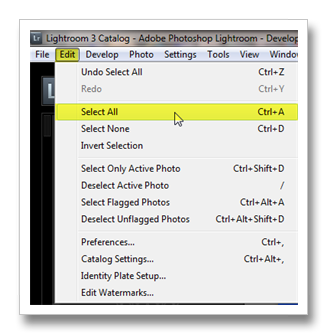
Now for the same procedure in Adobe Lightroom 3. First open your folder (after importing into Lightroom). Click on the “Develop” module at the top of the page, select the photo that you will use for the custom white balance and choose “Edit”, “Select All.”
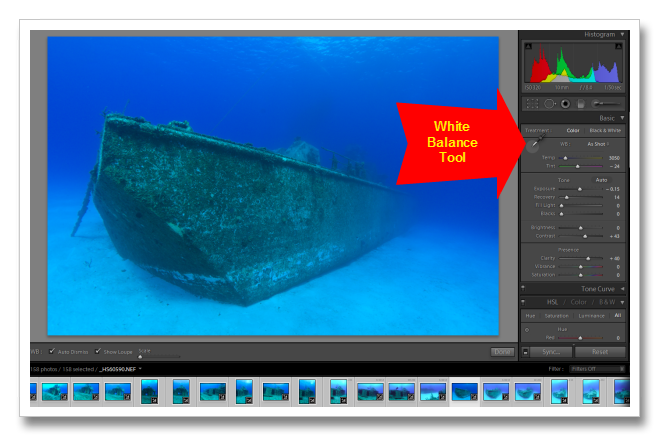
Choose the “White Balance” tool under the “Basic” heading on the right side of the screen.
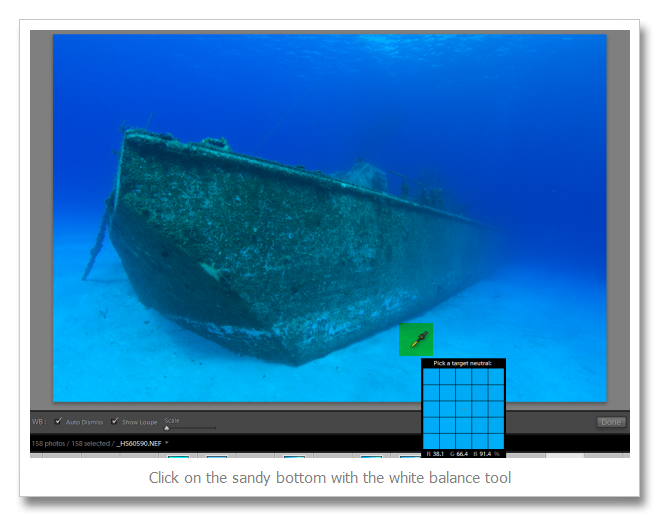
Use the white balance tool and click on an area of the bottom for a custom white balance.
The result will look like this:
Here is our second sample photo that I showed above after custom white balancing in raw. These were done with the photo above in Lightroom.
Of course, none of this would have been necessary if I had been able to do my custom white balance on the bottom but there are times when things just don’t go right. I had to do some fine tuning to the photos, especially those that were shot in different light but it was much easier than trying to do each photo by itself.
You can purchase Magic Filters direct from Magic-Filter in the United Kingdom or you can buy them from Reef Photo & Video in Florida.
© 2010, Herb Segars. All rights reserved.
