The other day, I went outside and found a praying mantis clinging to the siding of my house. I grabbed by trusty Nikon D300 and a Nikon 60mm f2.8 macro lens and my Benbo tripod. The praying mantis was in a weird spot and it was hard to get the tripod set up correctly. I ended up lying on the ground and the tripod was more of a monopod than a tripod. I started taking photos and then I remembered something that I saw on Lynda.com. It was about shallow depth of field and how to use the Auto Align Layers and Auto Blend Layers in Photoshop CS4 to increase the depth of field. When I am shooting macro, shallow depth of field is always a problem. I had my lens opening on f29 and was using the on-camera flash with a shutter speed of 1/60th second. My plan was to take a series of photos of the praying mantis and to change the focus point in each photo and then to see how I could combine them in Photoshop.

In the first photo, I had the head of the praying mantis and one of the legs in focus.

In the next photo, the back of the praying mantis and a portion of the left leg was in focus.

In the last photo the back of the praying mantis and the left middle leg are in focus. In Adobe Bridge, I left clicked on the first photo, then held down the Shift key and clicked on the third photo, selecting them all.
From the top menu, I chose:
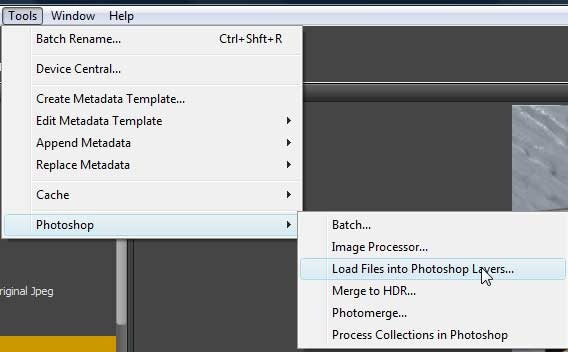
Tools, Photoshop, Load Files into Photoshop Layers. This would take the three photos and load them into separate layers in one Photoshop file.
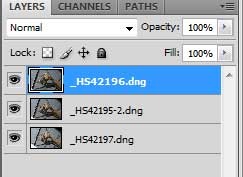
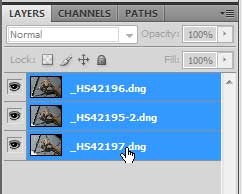
Once in Photoshop CS4, I saw the three photos in the Layers box. I did not do anything to these raw files before starting this exercise except to open them up in Adobe Camera Raw and use the Clarity slider on each of them. Other than that one action, they are just as I shot them in the camera. I needed to work with all three layers so with the first layer selected, I held down the Shift key and clicked on the third layer – selecting all three. The layers box now looked like this:
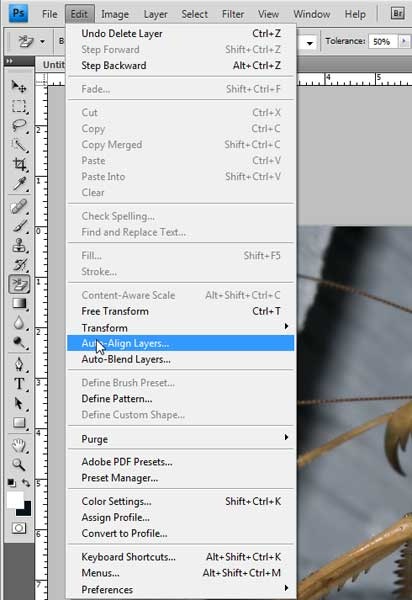
I went to the top menu bar and chose Edit, Auto Align Layers.
I was presented with another choice box:
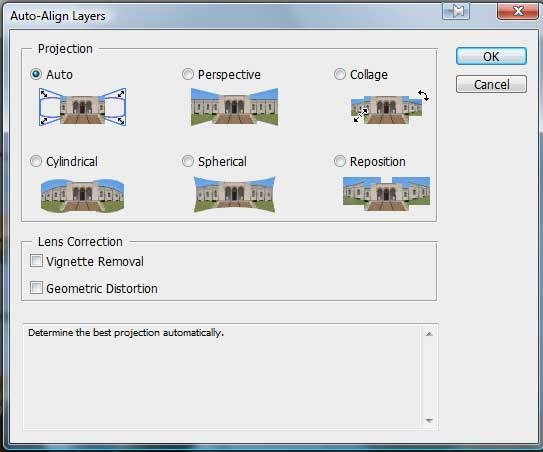
I chose the default Auto selection and clicked OK. The program did its thing and I ended up with the following:

You can see that I moved the camera between shots but Photoshop CS4 did a great job of aligning the layers. The next process would be to Auto Blend Layers and Photoshop would create layer masks to hide the out-of-focus parts of the image and show the in-focus parts of the image.
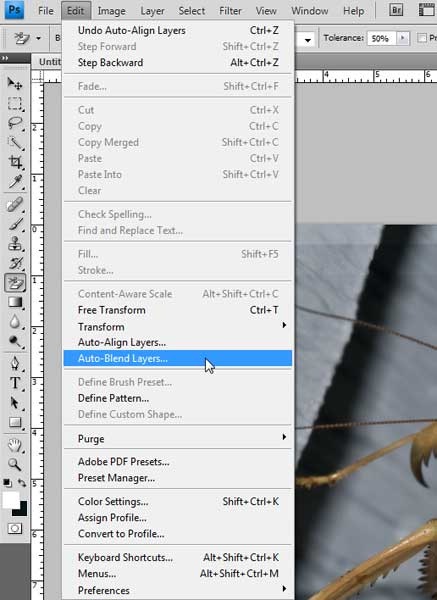
Back to the Edit menu and I chose Auto Blend Layers. I was presented with another choice box:
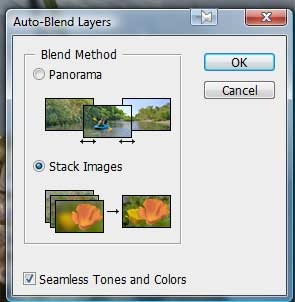
I chose Stack Images since I was shooting a panorama and I left the Seamless Tones and Colors box checked. Again, Photoshop CS4 did its thing and you can see in the Layers box that layer masks were created to mask out the out-of-focus areas.
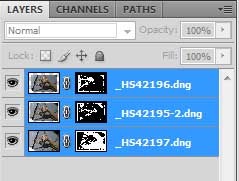
Here is a layer mask of the middle layer. You can see it by holding down the Alt button (Cmd button on a Mac) and left clicking on the layer mask.
Now for the final result:

Now this isn’t the best photo that I have ever taken and I wish that the white area in the lower left was not there. It is actually a white molding on the corner of the house but you can see by looking at the first three photos that the final result is miles better than any of the three by themselves.
I have included a Quicktime movie to show you everything that I explained above. Please use the controls at the bottom of the image to view the movie. If you cannot see the movie, please update Quicktime. The movie doesn’t seem to work with older versions of Quicktime. Click here to update.
I hope that you find this tutorial interesting.
© 2008 – 2009, Herb Segars. All rights reserved.


Great, clear and easy to follow guide to what is an excellent feature.
Many thanks
T
Thank you for these clear instructions. I have tried to use this feature before, but didn’t understand the instructions. My results are excellent!
L Booker
I used to be an ardent fan of Photoshop Elements https://www.frogmix.com/search/photoshop+element . I have version 3. 4 wasn’t quite compelling enough. Now that CS3 is out, are we going to see a Mac update or is this it? I cannot imagine uploading my photos to the server every time I want to edit them. Yuk. If it’s limited to low res, then definitely not.